Create an Experiment#
Create new experiment#
To create a new experiment, run the following command:
autosubmit expid -H <HPCname> -d "<Description>"
Where:
HPCname- The name of the main HPC platform for the experiment (will be the default platform for all tasks)Description- A brief description of the experiment
Options:
$ autosubmit expid -h

Output:
usage: autosubmit expid [-h] [-op | -ev | -t]
                        [-dm | -min | -fs {Any,READY,COMPLETED,WAITING,SUSPENDED,FAILED,UNKNOWN}]
                        [-y COPY] [-repo GIT_REPO] [-b GIT_BRANCH]
                        [-conf GIT_AS_CONF] [-local] [-H HPC] -d DESCRIPTION

Creates a new experiment

optional arguments:
  -h, --help            show this help message and exit
  -op, --operational    creates a new experiment with operational experiment
                        id
  -ev, --evaluation     creates a new experiment with evaluation experiment id
  -t, --testcase        creates a new experiment with testcase experiment id
  -dm, --dummy          creates a new experiment with default values, usually
                        for testing
  -min, --minimal_configuration
                        creates a new experiment with minimal configuration,
                        usually combined with -repo
  -fs {Any,READY,COMPLETED,WAITING,SUSPENDED,FAILED,UNKNOWN}, --filter_status {Any,READY,COMPLETED,WAITING,SUSPENDED,FAILED,UNKNOWN}
                        Select the original status to filter the list of jobs
  -y COPY, --copy COPY  makes a copy of the specified experiment
  -repo GIT_REPO, --git_repo GIT_REPO
                        sets a git repository for the experiment
  -b GIT_BRANCH, --git_branch GIT_BRANCH
                        sets a git branch for the experiment
  -conf GIT_AS_CONF, --git_as_conf GIT_AS_CONF
                        sets the git path to as_conf
  -local, --use_local_minimal
                        uses local minimal file instead of git
  -H HPC, --HPC HPC     specifies the HPC to use for the experiment
  -d DESCRIPTION, --description DESCRIPTION
                        sets a description for the experiment to store in the
                        database.
Examples:
# Basic experiment creation
autosubmit expid --HPC marenostrum4 --description "experiment is about..."

# Create from repository with minimal configuration
autosubmit expid -min -repo https://earth.bsc.es/gitlab/ces/auto-advanced_config_example \
                 -b main -conf as_conf -d "minimal config example"

# Create dummy experiment for testing
autosubmit expid -dm -d "dummy test"
Configuring Default Platforms#
If you have an autosubmitrc or .autosubmitrc file in your home directory, you can configure a default platforms file that will be used as a template for new experiments.
Add the following to your autosubmitrc file:
[conf]
custom_platforms = /home/Earth/user/custom.yml
Note
The path must be absolute (like the output of pwd) and include the filename of your custom platforms configuration.
Copy another experiment#
To copy an existing experiment with a new unique identifier:
# Copy experiment with default configuration
autosubmit expid -y <EXPID> -H <HPCname> -d "<Description>"

# Copy experiment with custom configuration path
autosubmit expid -y <EXPID> -c <PATH> -H <HPCname> -d "<Description>"
Where:
EXPID- The experiment identifier to copy fromHPCname- The name of the main HPC platform for the new experimentDescription- A brief description of the new experimentPATH- (Optional) Path to custom configuration directory
Examples:
# Copy experiment to Ithaca platform
autosubmit expid -y a0b1 -H ithaca -d "Copy of experiment a0b1"

# Copy with custom configuration path
autosubmit expid -y a0b1 -p "/esarchive/autosubmit/genericFiles/conf" \
                 -H marenostrum4 -d "Modified copy of a0b1"
Warning
You can only copy experiments created with Autosubmit 3.11 or above.
Tip
You can configure default platforms in your autosubmitrc file:
[conf]
custom_platforms = /home/Earth/user/custom.yml
Create a dummy experiment#
Dummy experiments are useful for testing your Autosubmit configuration without expensive computations. They behave like regular experiments but only submit sleep jobs to the HPC platform.
To create a dummy experiment:
autosubmit expid -H <HPCname> -dm -d "<Description>"
Where:
HPCname- The HPC platform to testDescription- A brief description
Example:
autosubmit expid -H ithaca -dm -d "Testing Autosubmit configuration"
Create a test case experiment#
Test case experiments use a reserved “t” prefix in their experiment ID to distinguish testing suites from production runs. They allow you to create experiments with specific configurations for testing purposes.
To create a test case experiment:
autosubmit testcase
Options:
$ autosubmit testcase -h

Output:
usage: autosubmit testcase [-h] [-y COPY | -min] -d DESCRIPTION [-c CHUNKS]
                           [-m MEMBER] [-s STARDATE] -H HPC [-repo GIT_REPO]
                           [-b GIT_BRANCH] [-conf GIT_AS_CONF] [-local]

create test case experiment

optional arguments:
  -h, --help            show this help message and exit
  -y COPY, --copy COPY  makes a copy of the specified experiment
  -min, --minimal_configuration
                        creates a new experiment with minimal configuration,
                        usually combined with -repo
  -d DESCRIPTION, --description DESCRIPTION
                        description of the test case
  -c CHUNKS, --chunks CHUNKS
                        chunks to run
  -m MEMBER, --member MEMBER
                        member to run
  -s STARDATE, --stardate STARDATE
                        stardate to run
  -H HPC, --HPC HPC     HPC to run experiment on it
  -repo GIT_REPO, --git_repo GIT_REPO
                        sets a git repository for the experiment
  -b GIT_BRANCH, --git_branch GIT_BRANCH
                        sets a git branch for the experiment
  -conf GIT_AS_CONF, --git_as_conf GIT_AS_CONF
                        sets the git path to as_conf
  -local, --use_local_minimal
                        uses local minimal file instead of git
Example:
autosubmit testcase -d "TEST CASE cca-intel auto-ecearth3 layer 0" \
                    -H cca-intel -b 3.2.0b_develop -y a09n
Profiling experiment creation#
You can profile the experiment creation process to analyze performance. To enable profiling, add the --profile (or -p) flag to your autosubmit create command:
autosubmit create --profile <EXPID>
Note
Remember that the purpose of this profiler is to measure the performance of Autosubmit, not the jobs it runs.
This profiler uses Python’s cProfile and psutil modules to generate a report with simple CPU and
memory metrics which will be displayed in your console after the command finishes, as in the example below:
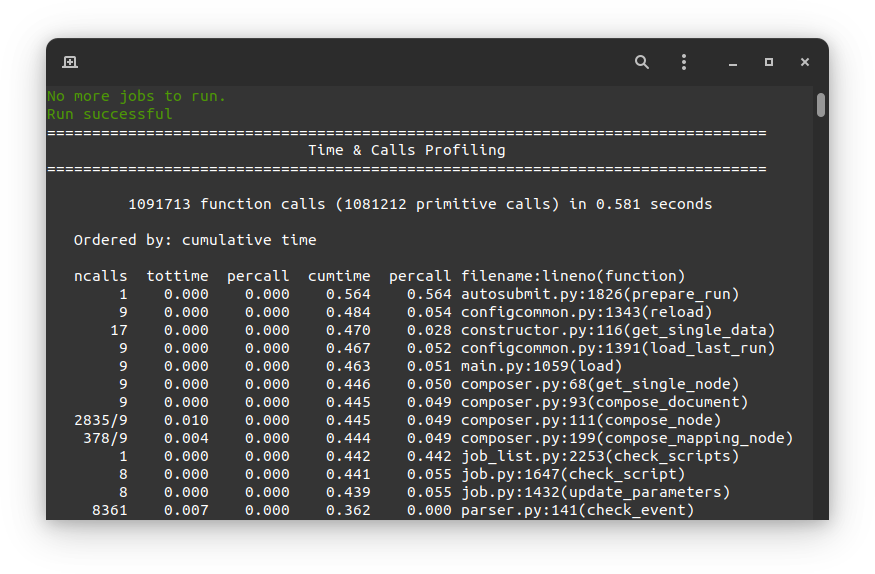
The profiler output is also saved in <EXPID>/tmp/profile. There you will find two files, the
report in plain text format and a .prof binary which contains the CPU metrics. We highly recommend
using SnakeViz to visualize this file, as follows:
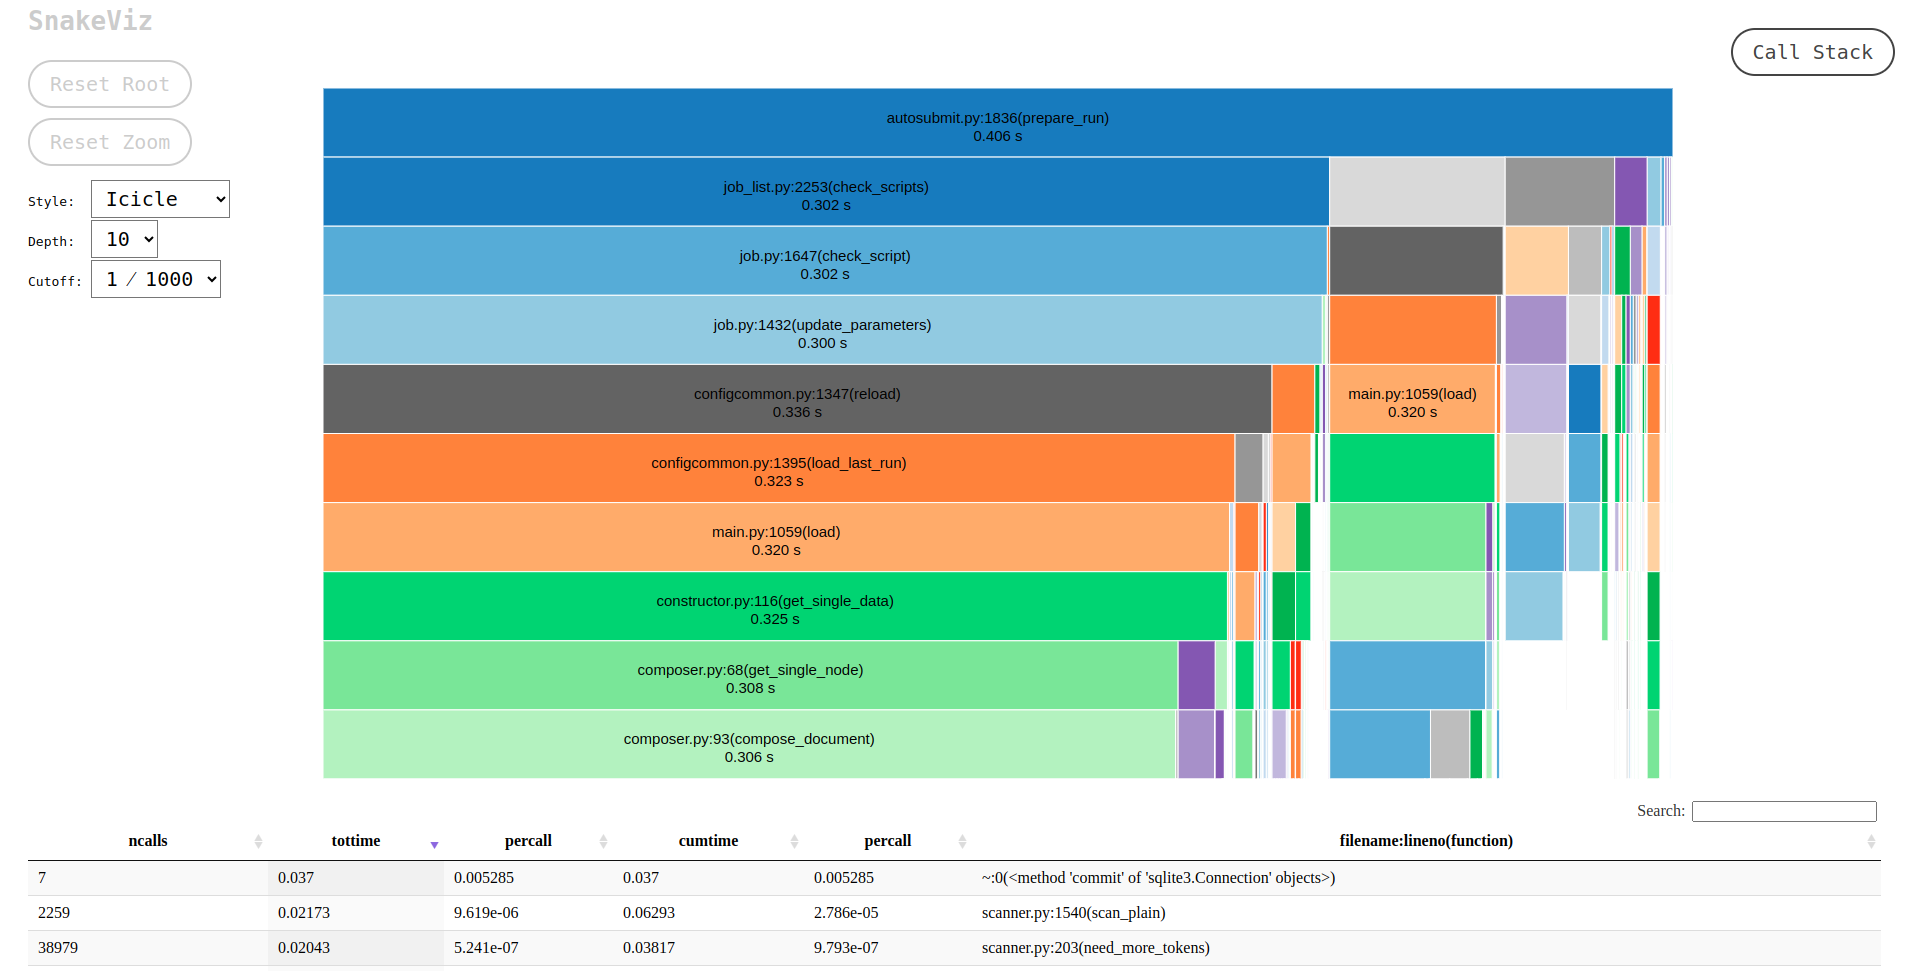
For more detailed documentation about the profiler, please visit this page.